How to Paint a Wall
Firstly don't panic painting is not as daunting as it seems and it's not as difficult as you might think to get a professional finish.
Sugar Soap
Two Sponges
Cleaning Cloths
Filler
Fillet Knife
Fine Sandpaper
Sugar soap diluted in water and applied with a sponge is the perfect solution for removing grease and grime from the walls as it is alkaline. The first important thing to do is to open a window as it needs to be well ventilated, if you're using in a particularly small room I'd recommend using a mask. Make sure that you don’t over wet the sponge as this can cause dampness. Don’t scrub too hard as you don’t want to cause the paint already on the wall to flake off. Use the second sponge to rinse the wall with a clean sponge afterwards, you do not want any sugar soap residue left on the wall you're painting because this can cause the paint to become streaky. Once clean dust the surface with dry clean cloths, this gets rid of any leftover water from the surface of the wall.
Once the surface of the wall is clean and dry you need to fill any holes. Either mix water and Polyfilla powder to the required consistency following the instructions on the packet or if using the premade type stir until it is a creamy consistency. Press the filler into the crack using a fillet knife and smooth with a damp finger or the edge of the knife. If the hole is particularly deep press into the hole and allow to dry, once dry add another layer and repeat until filled. Any tool or cloth with filler on needs to be washed with warm soap and water before it dries or this will set hard and ruin your tools.Once the filler is fully dry you will need to sand it with fine sandpaper, using fine sandpaper will give you a much smoother result than harsher grain papers. As you do this blow the dust away and wipe with a cloth to make sure there is no dust on the wall as this would cause the paint to go on lumpy.
Now you have a smooth and clean surface you're ready to begin painting!
Start by putting down dust sheets, old towels or plastic sheeting to protect the flooring, if you're renovating a project house it's often worth leaving the old carpet in place to rip out once you're finished with all the mess jobs. Firstly make sure all pets are secure, so you don't end up with little accidents... Then swap into clothes you don't mind getting covered in tiny droplets of paint, because no matter how careful you are there is inevitably a bit of fall out.
Once you've chosen you're the perfect colour you're ready to begin painting! If you're still unsure what colour you want to paint you should check out my post on how to pick the perfect palette for your home. To open a paint tin you use a flat head screwdriver to prise the lid, be careful not to use too much force or you could slip and injure yourself. You need to use a pivoting action, and then gently work around the tin until the lid prises off.
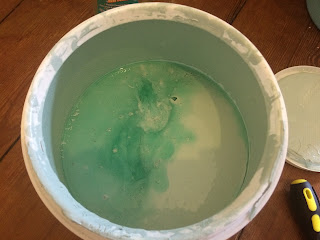
When you open the paint you'll probably notice its separated or looks an uneven colour, this is because paint is mostly made up of oil and mineral pigments when the paint sits on a shelf in the store the pigments sink to the bottom. Don't worry this is easily fixed by giving the paint a good stir, make sure to stir the paint gently to avoid any air pockets developing. Using an angled brush carefully paint all the edges neatly along the skirting board, ceilings, and make sure to paint the corner seems as this is difficult to paint with a roller. Make sure you take your time to neatly line the edges being careful not to get paint on the skirting board as any mistakes here will be noticeable later, if you do smudge paint onto the skirting board be sure to wash it off now as it is easier to get off while wet. Once you're done here you won't need the brush for a while so the best thing to do is to wrap it in some cling film and pop it in the freezer, this stops the paint drying out and ruining your brush but also saves you time washing it.
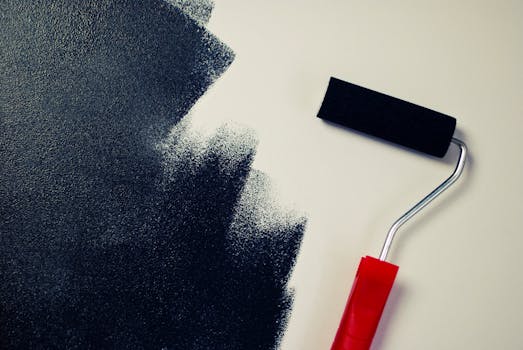
Pour some paint into a painters tray, don't pour too much as you want the shallow half to still be dry and be careful of drips from the ends of the can, it is a good idea to have some kitchen roll on hand to mop up any spills. You can get painters trays from Wilko or Poundland for a steal with one roller so if you're only doing a small space it's not worth shelling out on a decent set. To get paint on your roller dab it in the paint and then roll across the shallow textured end of the tray to get an even coverage on your roller. Then start painting - don't push on the roller as this gives you a less even coverage and encourages the paint to flick off at you which isn't fun for anyone. You want to paint in cross hatches rather than up and down motions, the reason to paint diagonally is that you don't want to create lines in the paint which will be noticeable when it is dry. You want to cover everywhere, and over where you have painted at least once again to make sure there is an even coat, once you've done this you should leave it to dry for around three hours. After this time you'll be able to see if you need to touch up any areas or if you need to give it a second coat.
To do a second colour always use painters tape along the seem to give an even finish, use one continuous strip otherwise you will have little imperfections, then follow the instructions above. While the paint is still damp remove the painters' tape to avoid pulling paint away with it, which is an easy mistake to make.
And voila it's done!


No comments
Post a Comment